How to create your project's plan?
Understand how to create a plan for a project
Create a plan for a project
In PSOhub, you can create a plan for a project directly from the project or choose from the menu Plans > Plans.
From a project
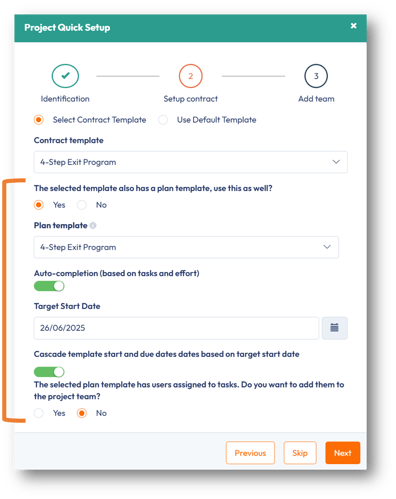
When creating a project directly in PSOhub, you can select a plan template once you have chosen your contract template. If the plan template contains users and/or roles, you can determine whether to add them to the project team. You can also cascade your start and due dates based on the plan template's dates, using the Cascade
Note: This will only be possible if there is a plan for that contract template.

Click Next and then Create to finish creating your project.
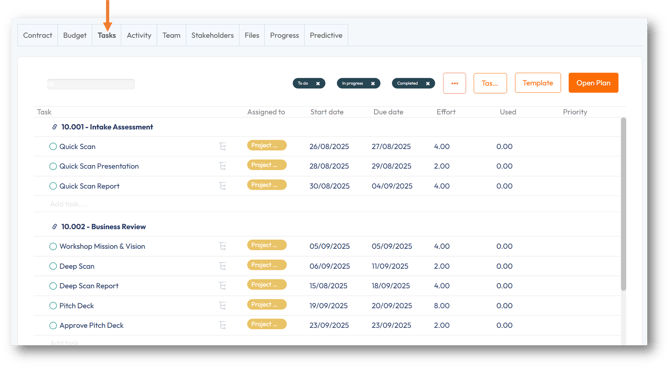
Next, navigate to the Tasks tab. You will now see all the tasks related to the plan previously selected, grouped under their respective task lists.

If you have created your project without pre-selecting a plan template, in your project, navigate to the Tasks tab. From here, you will also be able to create a Plan.

To create a project plan from a template, click on Template and use the drop-down list to select the one you want, then click Save.

PSOhub will now display the plan based on the template you selected.
If you do not have an existing plan template for this contract, you can leverage the Add Task list button to build this plan. You can decide to replicate your contract lines as task lists and add a series of tasks and sub-tasks under them, or you can decide to create a different structure of task lists - however in case you won't be able to book time towards the tasks as they need to be related to a contract line.
Note: When you want to create your task list based on the contract lines of your project, you first need to navigate to the Contract tab and check the box Add as task list (then click Save) for each contract line you wish to create as a task list.

When doing so, PSOhub will automatically create a task list for the contract line and display it as such in the Tasks tab. This feature is also the one to leverage when you add a new contract line to an existing project and want it to be included in your existing plan as a task list.
To view the plan in a "full" screen view, you can hide the left and right panes by clicking the corresponding black arrows at the top of the screen (just below the main menu).

From here you can:
Once you are done creating your tasks, you can move them around with the drag and drop functionality - within the same task list or across task lists within the plan.
Create a plan for a project via the Plans menu
Choose from the menu Plans > Plans.

By default, all plans are displayed:

To create a plan related to a project, click Create.

PSOhub will open the following dialog box for you to complete.

The table below explains the above fields:
|
Field |
Description |
|
Name |
Enter the name for this plan. Note: The plan name must not contain the apostrophe character ('). |
|
Link to project without a plan (optional) |
Use the drop-down list to select an existing project for which you wish to create this plan. |
|
Currency |
Set the currency for the plan. |
|
Start |
By default, this is today's date. |
|
ETA |
Estimate Time of Arrival. |
|
Stage |
By default, plan stages are Active and Closed. In the Project settings, you can define additional stages. |
|
Based on plan template |
This field is optional. You can decide to select a plan template here or to create a new plan for this project. |
|
Cascade template start and due dates based on target start date |
This will cascade the task start and due dates of all tasks based on the Target Start Date, if dates have been set up on the plan template being used. |
Click Save. PSOhub will now display your new plan:

From here, you can perform the same actions as within a project.
