
Published: 01 June 2026
Audience
-
All Users
Objective
This article explains how to book expenses in PSOhub. You can log expenses from the global Expenses overview or directly from inside a project, depending on your access level.
Prerequisites
✅You must have an active PSOhub user account.✅At least one project with an expense contract line must exist.
✅To log expenses from within a project, you must have access to that project.
Book an expense from the Expenses overview
Steps
Use this method if you do not have direct access to a project, or if you prefer to manage all expenses from a central location.
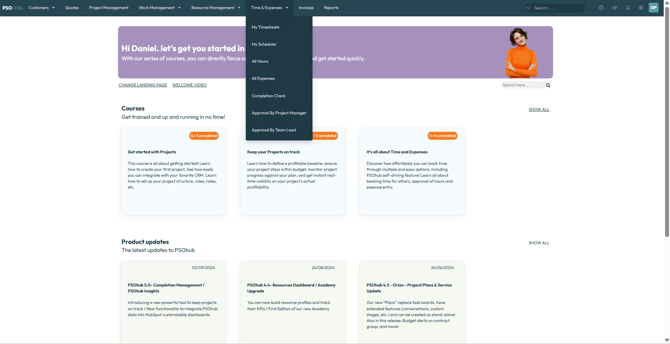
- Navigate to Time & Expenses in the top menu and select All Expenses.
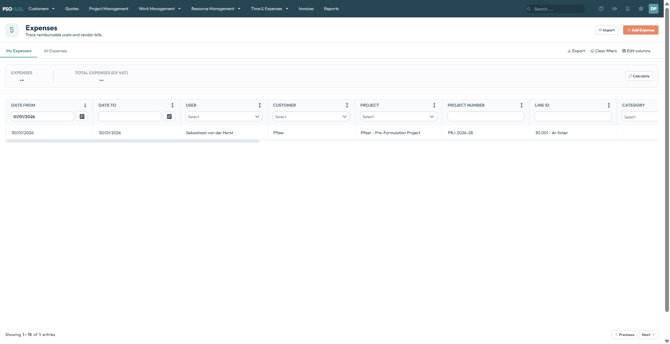
- Click + Add Expense in the top right corner.
- The Expense dialog opens. Complete the fields as described in the table below.
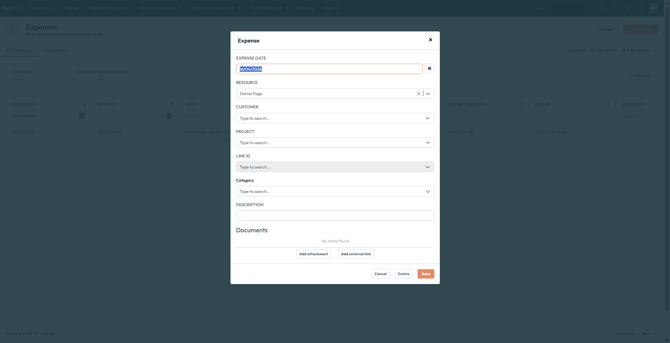
- To add supporting documentation, click Add attachment to upload a file or Add external link to reference an external document.
- Click Save.
💡 Tip: Attaching receipts at the time of logging keeps your expense records audit-ready and makes the approval and invoicing process smoother.
The expense is saved and appears in your My Expenses list.
Book an expense from inside a project
Steps
Use this method if you have access to the project and want to log expenses in context.
- Open the project from Project Management.
- Click the Expenses tab in the project navigation.
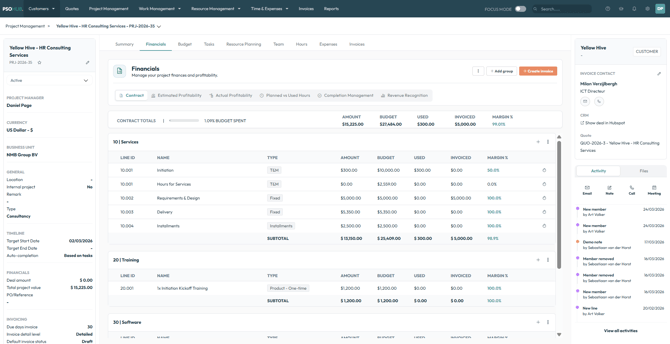
- Click + Add Expense in the top right corner.
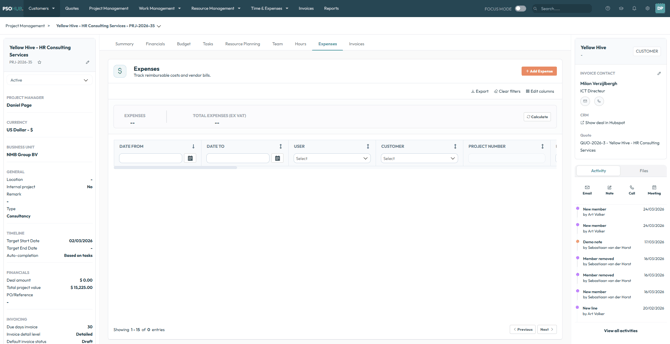
- The Expense dialog opens with the Customer and Project fields pre-populated. Complete the remaining fields as described in the table below.
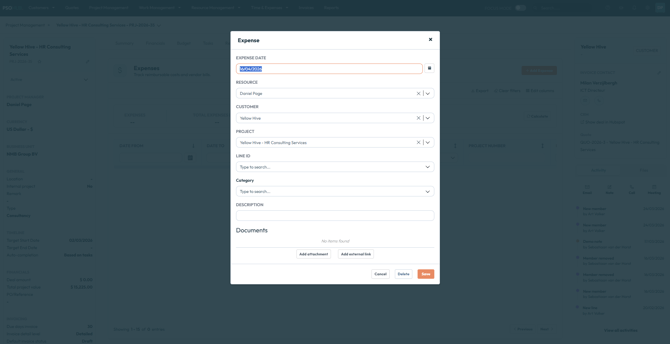
- To add supporting documentation, click Add attachment or Add external link.
- Click Save.
The new expense is saved and appears at the top of the project's expense list.
Result
The expense is saved against the selected project and contract line. It will appear in the Expenses overview and is available for invoicing once the project's billing workflow is triggered.
📌 Note: Expenses are not invoiced automatically; they must be included when creating an invoice for the project.
Troubleshooting
The Line ID field shows no options The selected project may not have an expense contract line configured. Ask your PSOhub administrator to add an expense line to the project's contract.
I cannot find the project in the Project field You may not have access to the project, or the project may be inactive. Contact your project manager or PSOhub administrator.
The Add Expense button is not visible Your user role may not include permission to log expenses. Contact your PSOhub administrator to verify your access level.
The expense is not appearing on the invoice Expenses must be added to an invoice manually. Open the project's invoicing workflow and confirm the expense contract line is included.
Frequently Asked Questions
Can I book an expense on behalf of another team member? Yes. When logging an expense from the Expenses overview, change the Resource field to select another user. This allows managers or administrators to log expenses on behalf of colleagues.
Can I attach multiple receipts to one expense entry? Yes. Click Add attachment multiple times within the same expense dialog to upload more than one file.
What happens to an expense after it is invoiced? Once an expense has been included in an invoice, it is marked as invoiced and can no longer be edited. If a correction is needed, contact your PSOhub administrator.
Next Steps
✅ Make adjustments to submitted expenses
Review and update expense entries for yourself or on behalf of another resource.
Modify the expense on behalf of another resource
✅ Log any hours related to the expense
Don't forget to log your time associated with the expense.
Manual invoicing of T&M and expenses
✅ Create an invoice
Include approved expenses in a project invoice and send it to your customer.
Create an invoice in PSOhub